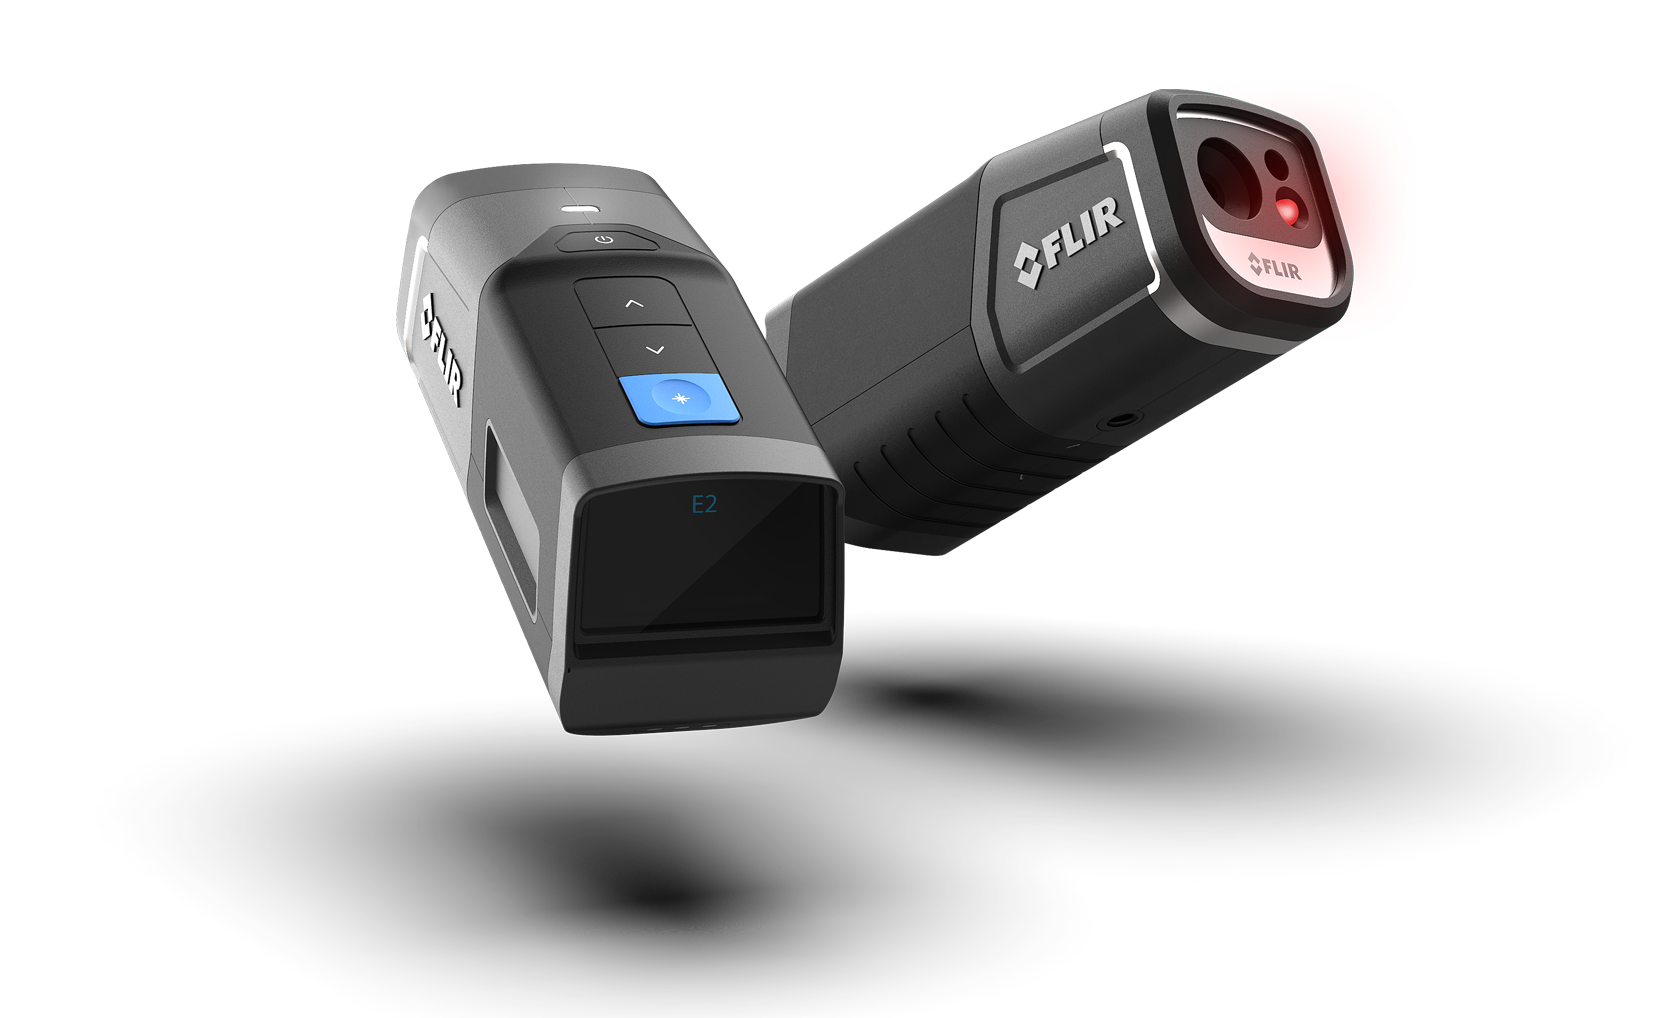
IR Thermometer
This is the result of a student project and does not necessarily represent the views of the brand.
The danger of burning yourself is constantly present in a lot of industries ranging from industrial maintenance to plumbing and foundry work. There are three scenarios presenting a harm to workers related to high temperatures: Contact burning, hazardous temperatures and malfunctions. To prevent injuries a possible solution is a portable ir-thermometer which workers in hazardous areas can wear during their daily work. Being part of the personal protective equipment it needs to be seamlessly integrated into the workflow and simple to use in every situation.
How can an ir-thermometer be used to increase workplace safety?“
Concept
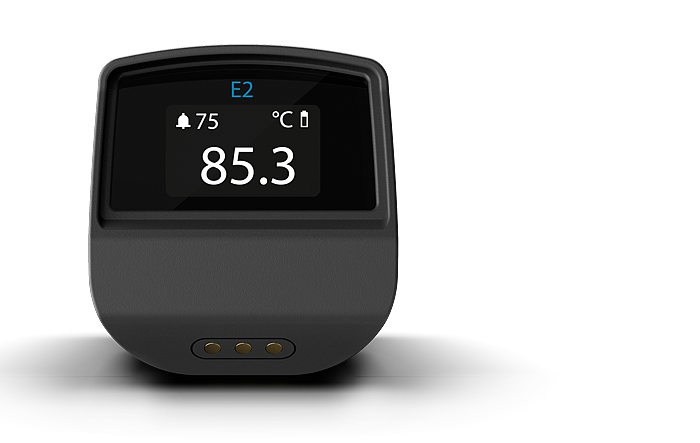
A small and lightweight ir-thermometer is attached to the protective helmet of the worked, constantly measuring the temperature in front and within an armslenght of reach. If the measured temperature crosses a certain threshold that has been set before, the worked is being notified via sound and a visual highlighting the identified area.Constant measure
Notification
Prevention
Brand
As a project exercise Flir was chosen as a suitable company working in the field of thermal imaging. The brand values as well as the design language and cmf was analyzed to create a product which would fit inside their portfolio.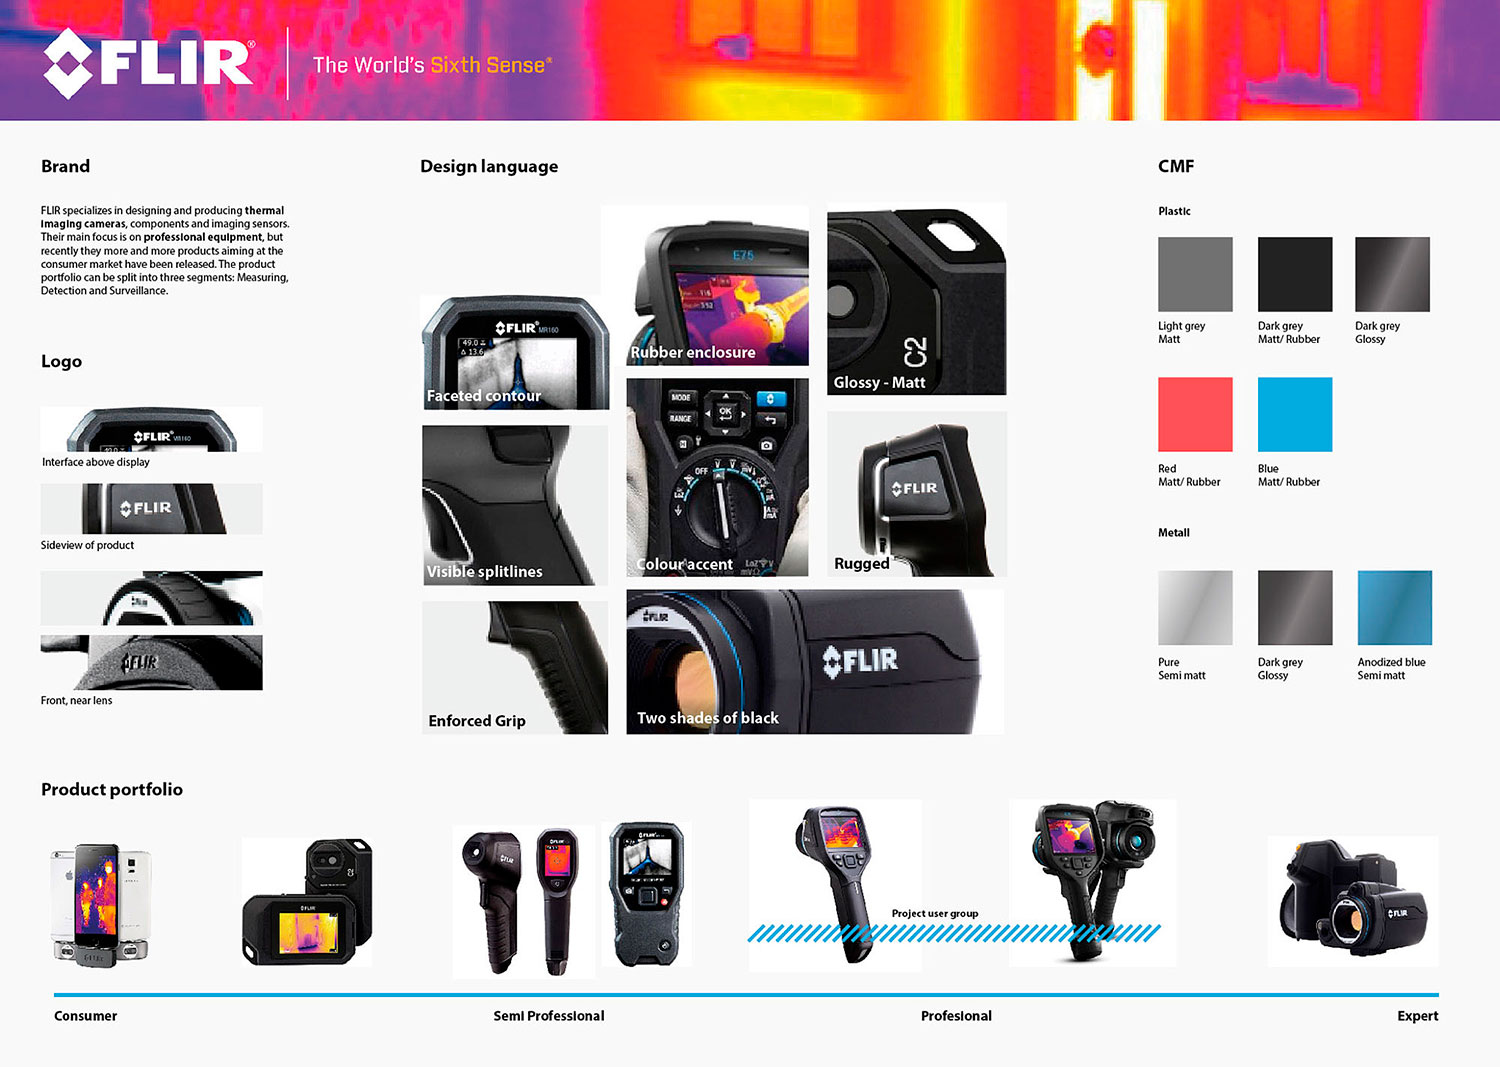

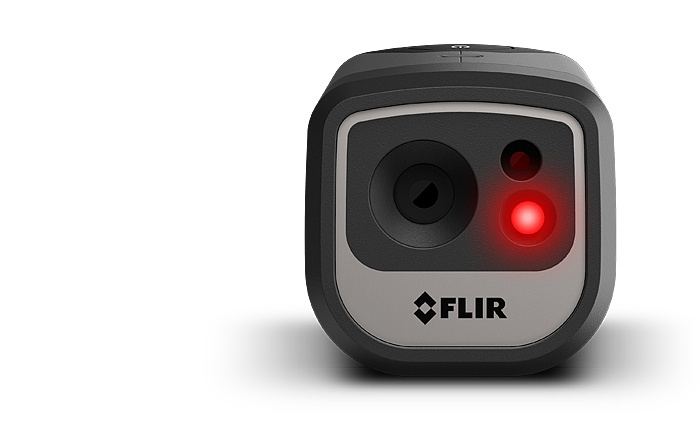

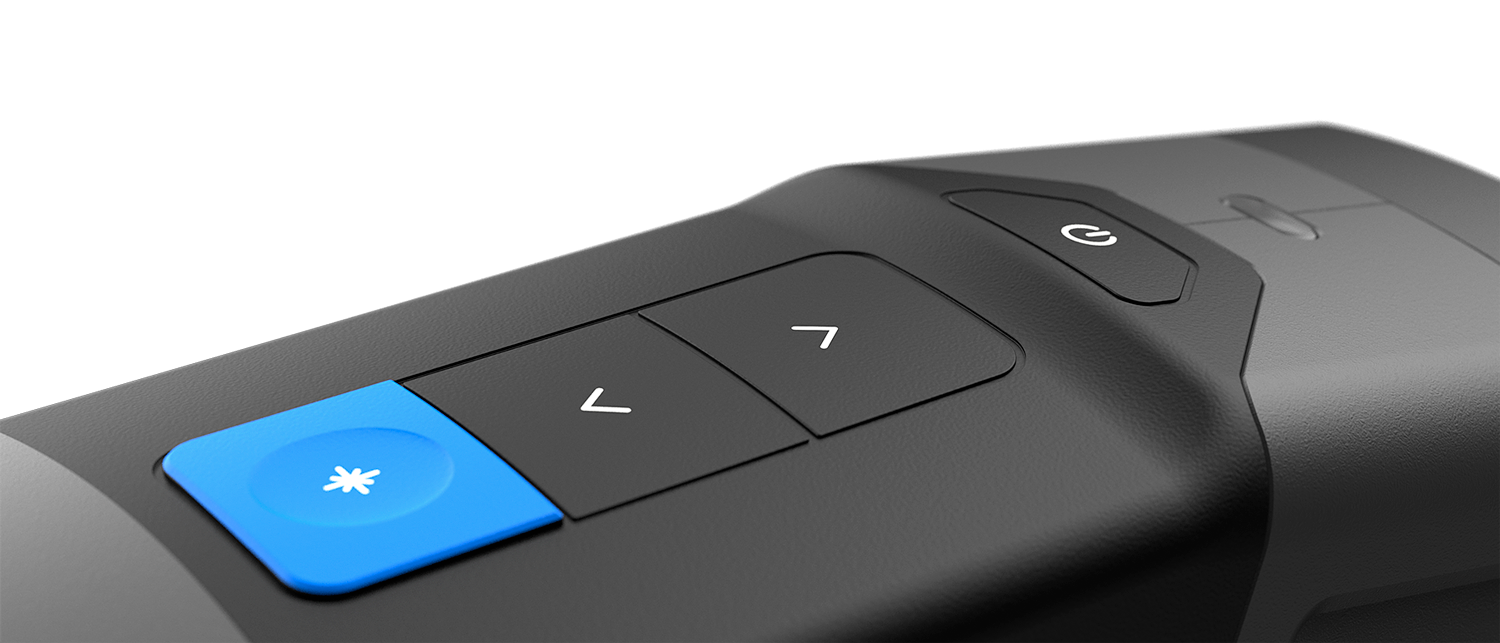
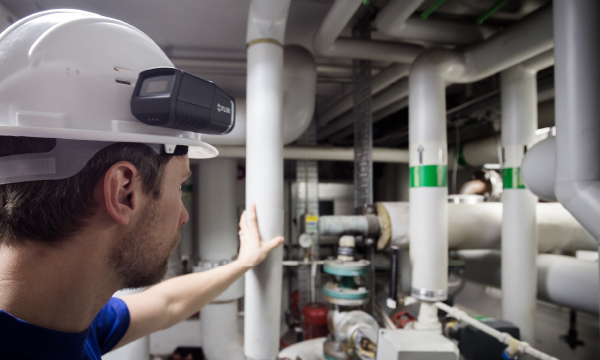
Helmet mount
The standard application involves mounting the thermometer to the side of a safety helmet. An easy to use magnet locking system enables the most simple and convenient usage.Belt mount
Mounting the device to the workers belt allows using it as a conventional ir-thermometer during the daily work.
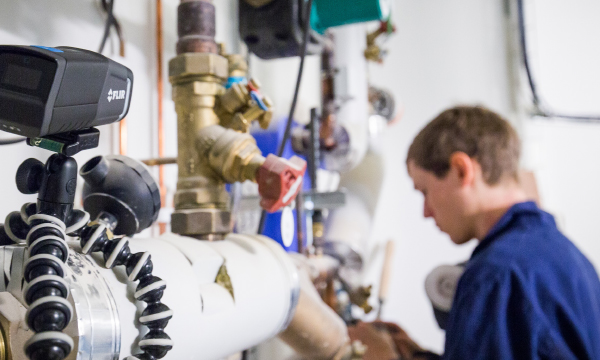
Tripod mount
A thread on the bottom allows to mount it on a tripod and use it to monitor a certain area over time or give you immediate feedback if the temperature rises while working.
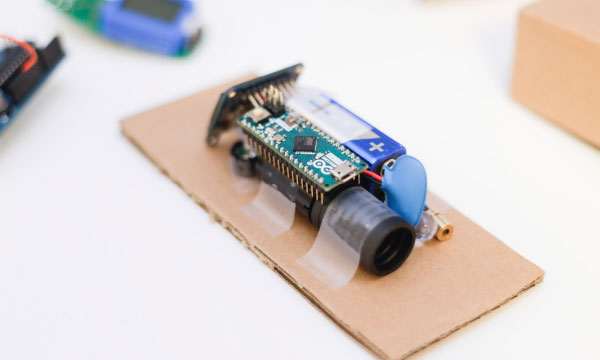
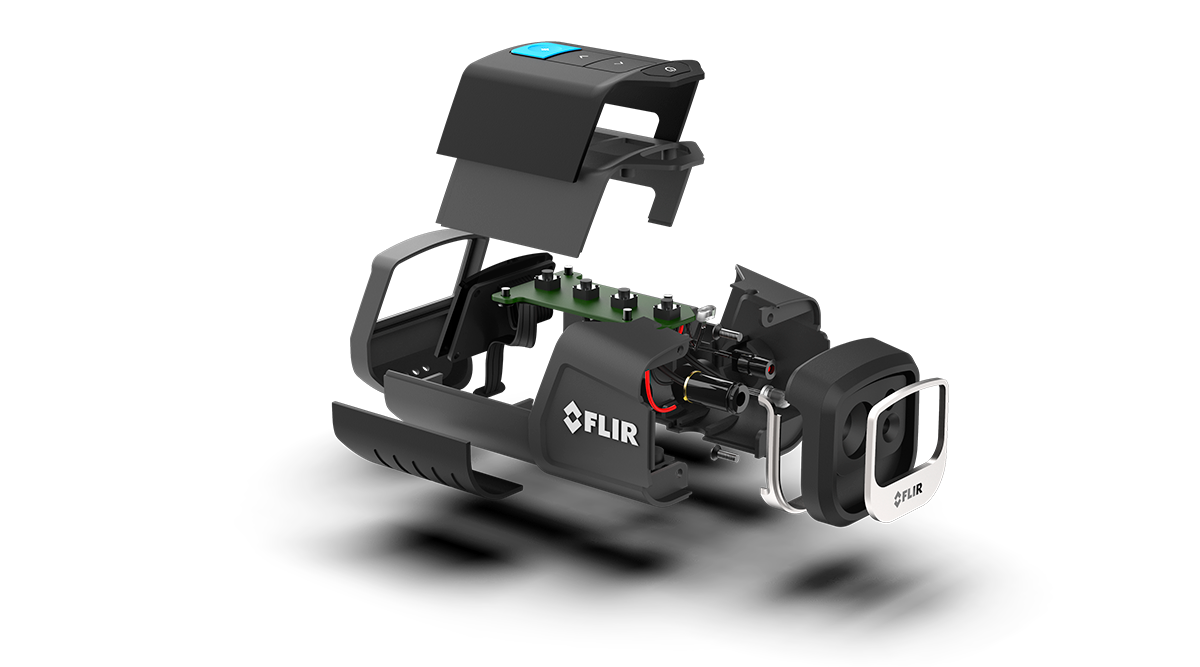
Internal components
To create a realistic approach and a fully functional prototype, first proportions were set in cardboardForm exploration
In a second step the form language of Flir was transferred to the volume
Detailing
The form was further detailed through illustrative sideviews. The design freeze was set after 24h.Prototyping
The arduino environment was used to create a working prototype and create a proof of concept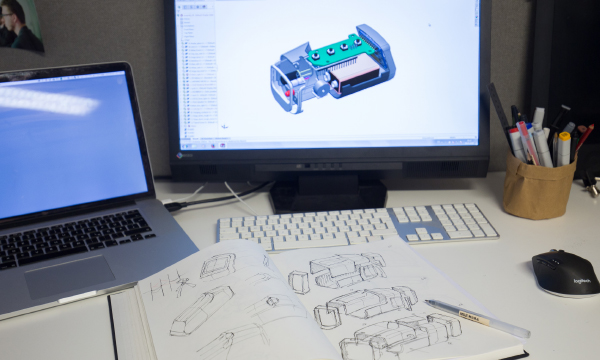
Design for manufacturing
The parts were consctructed and optimized for manufacturing in Solidworks. Different splitting and assembly possibilities were evaluated.Model building
3D printing was used to create the plastic shells which are held together with only two screws.